How to bake bread
November 10th, 2007 at 3:54 pm (Cooking)
The idea of baking bread carries with a sense of arduous labor: lots of stirring, lots of kneading, lots of work. I’ve been curious about it for a while, but who has the time for all that work when you can get a loaf of bread at the store for $2.19?
The other day, I came across a blog entry (by “The Simple Dollar”) titled Homemade bread: cheap, delicious, healthy, and easier than you think. Well, I could hardly pass up a challenge like that! Just how easy is it to make bread, I wondered?
It turns out: not hard at all. It’s not even that much work. The only trick having about three hours when you’ll be at home and can wait out the rise phases. The actual work you do is minimal, between the waiting bits.
The post I linked to above has a nice extended set of instructions (with photos) for how to make bread following a simple recipe. For brevity, I’d like to excerpt (and paraphrase) the actual recipe here:
- 1/4 cup milk
- 5 teaspoons sugar (or 1 1/2 tablespoons)
- 1 teaspoons salt
- 5 teaspoons butter (or 1 1/2 tablespoons)
- 1 package active dry yeast (you can get yeast near the flour at your local grocery store)
- 2 1/2 to 3 1/2 cups flour (get unbleached white for your first attempt)
- Corn starch or nonstick cooking spray (to prevent the bread from sticking to the bowl or pan)
- Warm up the bowl and mix the yeast with warm water.
- Melt butter in the microwave and add butter, milk, sugar, and salt to the yeast. Stir.
- Add 2 cups flour and stir until it is absorbed.
- Continue adding 1/4 cup of flour every minute (while stirring) until the dough just barely sticks to your finger.
- Drop dough onto floured surface and knead for 10 minutes.
- Form dough into a ball, put in a clean bowl, cover with a towel, and let it rise in a warm place for 1 hour.
- Punch the dough a few times to cause it to shrink back down a little. Spread dough out into a flat rectangle, as wide as your bread pan is long and 1.5 times as long as it is. Roll it up and stick it in the pan, seam side down. Cover with a towel and let it rise for another hour.
- Bake it in the oven at 400 F for 30 minutes. Done!
Challenges:
- My yeast packet didn’t indicate how to mix it up; it only had instructions for how to put it into a bread machine, not how to make it yourself (which I found amusing). Those instructions said to use 1/4 cup water. The post I mention above says to use “something along the lines of” one cup of water. So I used one cup of water. It seems like this might actually matter, but maybe extra water just calls for a bit of extra flour, so it evens out.
- It was a rather chilly day here in southern California (mid-60’s) so there wasn’t a “warm” place for the dough to rise in my house, and I didn’t feel like wasting oven heat for two hours. So it may not have risen as much as it could have.
- I only had bleached flour, not unbleached flour. ;)
- I had neither cornstarch nor nonstick spray. I did have a nonstick bread pan, though.
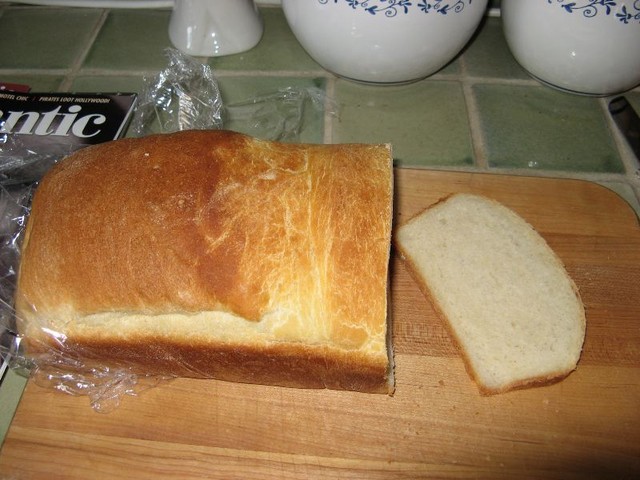
- I decided to experiment with spreading some butter on top of half of the loaf before baking it. This gave one side a “stretched” look from where my knife disturbed the yeast factory. Tastes fine, though.
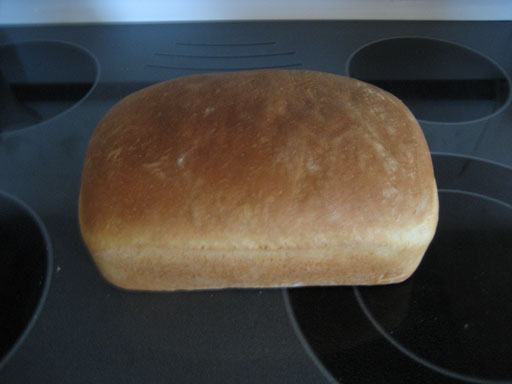
Despite these formidable obstacles, what came out in the end was… a fantastic loaf of white bread!
 |
 |
| The Simple Dollar’s end result | My loaf of bread |
The final instruction from The Simple Dollar is to “Let it cool down completely before slicing.” He’s kidding , right? Like you’d ever invest all of that effort, wait three hours, and not want to savor some fresh-baked, hot bread? Pshaw. Sure, it’s easier to slice when cooled, but it’s oh-so-tasty when it’s hot. :)
There’s something very satisfying about eating bread I baked. Maybe it’s that bread is such a symbol of adult independence (being the “bread-winner”) or just the feeling of being able to take “raw” materials and turn them into something refined and edible. Thumbs-up.