How to make a pie crust
August 7th, 2009 at 8:36 pm (Cooking)
 I made my first pie the other day—and followed it with my second pie a few days later. They provided the perfect final destination for my nectarine tree’s bounty. There’s something satisfying about making a pie and the crust and using your own homegrown fruit! Now if only I’d grown some sugarcane, harvested wheat, and milked my own cow… that would have been my own pie!
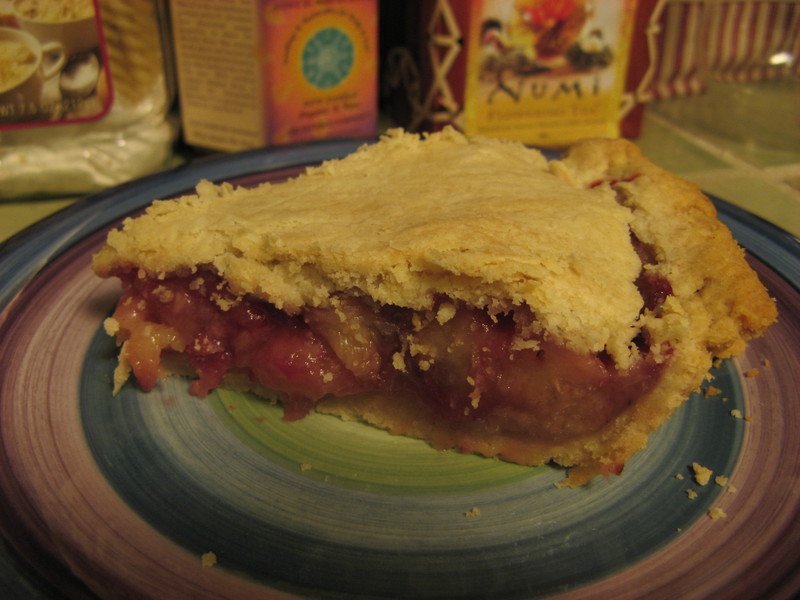
Now, while making pie-filling is trivial, making a good pie crust requires a bit more effort. I didn’t have the vegetable shortening that the recipe called for, so I substituted butter. I baked the first pie on an infernally hot day, and as I was squishing the butter into the flour, it was melting all over the place. The result was a gooey, sticky dough. I rolled it out anyway, with the liberal use of additional flour, using 2/3 of the dough for the bottom and the last 1/3 on top as the pie cover. And it turned out great.
But I suspected that the dough wasn’t supposed to be quite like that, and consultation with other pie-making friends confirmed this. So when I rolled up my sleeves to bake the second pie, I incorporated two useful tips I’d received.
- Instead of trying to cut or mash the butter into the the flour, freeze the butter and then grate it with a cheese grater.
- Instead of flailing around with rolling pin and flour, and scraping the dough off the cutting board with a knife, chill the dough and then roll it between two sheets of wax paper.
Both of these suggestions worked brilliantly, even though I didn’t bother to freeze the butter or chill the dough! I’d had success with the cheese grater before, when making biscuits, and it worked perfectly here—faster and less messy than other methods, and the mixture I got out was the appropriate “mealy” consistency, actually needing the recommended couple of tablespoons of water that caused it to glom into a dough.
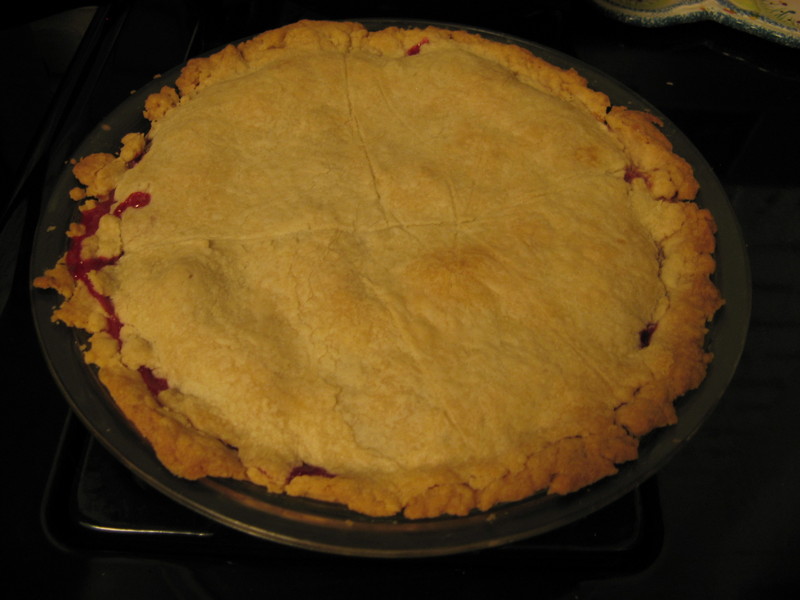
The wax paper trick is so fabulous that I wonder why it isn’t a staple of all pie recipes. (The one I have recommends rolling out the dough, folding it in half, lifting it into the pan (scraping with a knife if needed), and then unfolding it.) The wax paper not only saves you from having to add any flour (thereby altering the consistency slightly), but it is trivial to transfer the flattened dough into the pie pan (top or bottom) without breaking it; you simply invert the empty pie pan over the bottom crust, flip, and peel off the paper, and later flip the top crust onto the filled pie and again just peel off the paper. My wax paper worked a couple of wrinkles into itself, which left an interesting linear pattern on my pie crust, which I left because I liked it.
The end result with pie #2? A tasty, satisfying, even-thickness, flaky pie crust, with minimal effort.
Never content, friends are now giving me tips on cosmetic improvements, like crimping or fluting the pie crust edges, carving my initials in the pie top, or crafting a lattice. I’ll be sure to share any interesting future developments.