+2 Earrings of Powerful Resistance
May 29th, 2010 at 10:50 pm (Crafts, Engineering)
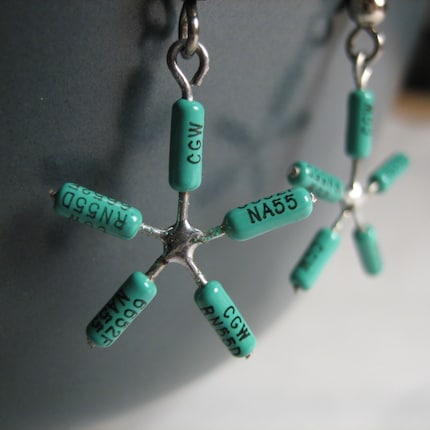
I always thought resistors had a certain chic appeal, with their banded color-codes. And so, during a recent trip to Radio Shack, I decided to pick up materials for making some ultra-geeky jewelry. It turns out that Radio Shack does still sell racks of electronic components, including resistors and capacitors.
Since I’ve never made any jewelry before, I appealed to a friend for a jewelry-making lesson. She’s made lots of her own necklaces, earrings, and bracelets, and showed up with books and magazines full of instructions and inspirations. She also brought lots of useful tools, mainly in the form of several different kinds of pliers and cutters. After playing around with the components a little to decide how to arrange them, we got to work.
 I learned how to shape the wires coming out of the ends of the components into little rings so they could be connected. I gripped the wire with the rounded pliers and used another pair to tightly wrap the wire into a circular shape. After snipping the end of the wire, I used the pliers again to bend the sharp, free end in towards the component so it wouldn’t poke or snag. While the tools are great, I can see that it takes some experience to get used to using them most effectively (I kept wanting to put them down and work with my less precise but more familiar fingers instead).
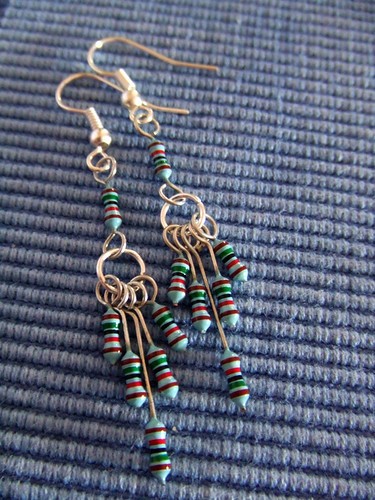
 My jewelry-crafting friend came up with the clever triangular arrangement and donated the hematite cubes that serve as the join point. The cubes didn’t have a hole large enough to pass both wires through, so we put one through and twisted the second one around the first, which was the most technically difficult part of this assembly.
We determined that the wires attached to the resistors and capacitors served quite well as jewelry wire, although apparently it is somewhat more flexible than is typical. However, I wouldn’t want to stick it in my ear (resistance wire is made from a nickel/chromium alloy which could irritate the skin of those with a nickel allergy), so we connected the earrings to sterling silver earwires.
Those are 1-μF capacitors. I wonder how many of my readers can specify the resistance of the resistors? (As a reference, here’s the resistor color code.) And in case you’re curious, here’s more info about how resistors actually work or how capacitors actually work.
Other cool ideas:

Katie said,
May 29, 2010 at 11:08 pm
Kiri – I was looking through my ‘random stuff’ box the other day with the intent to make a jewelry gift for a friend, and also found resistors. I think they are very convenient, with their little wires exiting each end…very craft-and-jewelry friendly. I had them from a light-up sculpture I made years ago. I love your example earrings!
Terran said,
May 30, 2010 at 9:54 am
Nice work! Very attractive, and kind-of subtly geeky — observers will have to get close to see what they really are. :-)
I wonder how many of my readers can specify the resistance of the resistors?
More importantly, since your earrings are serial RC circuits, I wonder how many can identify the total impedance, the resonant frequency, the time constant, and the impulse response function? ;-)
Scott said,
June 2, 2010 at 12:54 pm
Wow, that’s 22.4K of awesomeness!!!
Very nice work. Let me know if you stop hearing bass frequencies below 89Hz. ;-)
HeuristicsInc said,
June 10, 2010 at 3:03 pm
Very cool.
-bill
Jim said,
June 16, 2010 at 1:39 pm
Faraday cage wallet guy, here you come.