Change your diet, your exercise, and your community

At a recent community event, I came across a booth put up by Champions for Change, a California organization devoted to improving health through the consumption of fruits and vegetables, exercise, and community activism. Their website is interesting to browse, containing not only a plethora of healthy recipes and tips for increasing your physical activity, but also strongly encouraging readers to agitate for change where change is needed. From How to Make Healthy Changes:

Examples of things you can advocate for in your community:

  • Ask your local grocery store to sell quality fruits and vegetables at a low price.
  • Ask for a local farmers’ market in your community.
  • Ask about starting a community garden in your neighborhood.
  • Work with local schools to get after-hours and weekend access to play yards, gyms, and/or parks.
  • Ask the Department of Transportation to add bicycle lanes in your community.
  • Partner with the Department of Parks and Recreation to clean up the walking paths in your local parks.

I was really impressed by how, rather than expecting you to passively receive and implement someone else’s tips for healthy living, this organization emphasizes your active role in identifying ways your community can be improved and then making those changes happen. And that can apply much more broadly than just to physical health issues, of course!

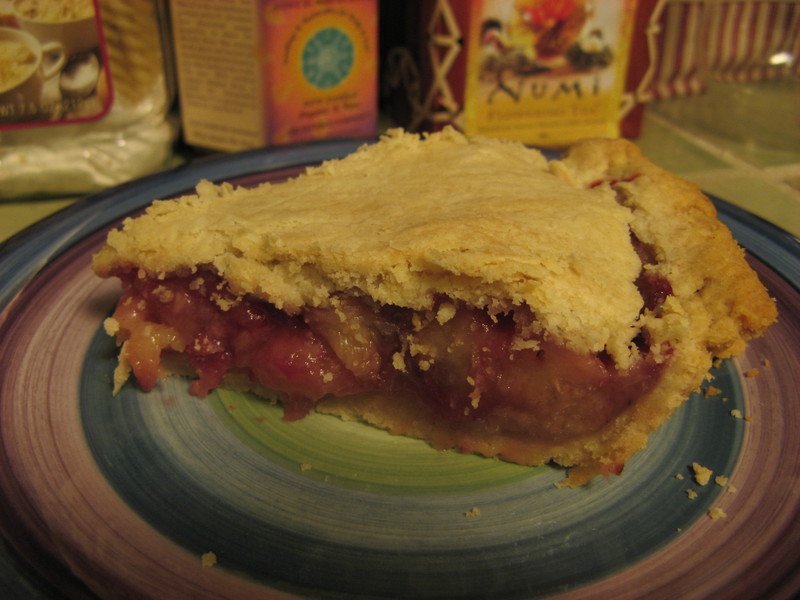
Locally, Champions for Change goes into our elementary schools and shows kids what healthy meals look like. Ideally, we’ll get away from the specter of children unable to identify a tomato! At the booth, they were making and giving out samples of Banana Tortilla Snacks: spread some peanut butter on a wheat tortilla (only in a single stripe, not coating the whole thing), sprinkle some raisins on, then peel a banana and put it on top, then roll the tortilla up. You have an instant, easy snack that can be consumed by the maker or sliced up to provide multiple tasty treats for others. This is considered healthy due to its inclusion of fruits and protein without going overboard on carbs and fat. It’s so tasty that I feel a little skeptical about just how “healthy” it is, but I’m not complaining. :) I could probably do with a larger dose of fruit, vegetables, protein, and exercise in my own life… and maybe even some community-oriented activism!

Programming with physics

Programming is the art of working out the logic needed to obtain some desired behavior from a system, such as a computer. I’m so used to achieving this with symbols, variables, and control keywords that it hadn’t really occurred to me that the same process has been used since long before computers were invented. Mechanical devices are “programmed” by specifying their physical design, and their behavior is “executed” with physics, not a CPU.

This came to me while I was reading a children’s book describing how a toaster works. What is the job of a toaster? To lie dormant until bread is inserted, then heat up for an appropriate amount of time, then automatically turn off and pop the toast up for easy removal. If I were going to create my own toaster, I’d go at it from a computer-logic perspective: acquire a sensor to measure the current toastiness of the bread (perhaps just its temperature), and then program a tiny embedded chip to respond when the sensor exceeds the desired threshold, at which point the toaster would send a command to the release lever so that the toast would be ejected. But is that how toasters are designed? No!

Toasters are a complete marvel of physics-based programming. There is no embedded chip, no logic to specify, no commands. Instead, the toaster relies on a bimetal bar, which bends to the left or right depending on the temperature, because its two metals expand at different rates. (I first encountered bimetallics when I asked my dad how our thermostat worked.) The same current that heats the toaster coils flows through this bimetal bar, and it gradually bends to the side, until it nudges the “heat-up lever” out of contact and instead engages the “cool-off lever”; as it cools back down and straightens, it then releases the cool-off lever which allows the spring-loaded release to pop the bread up.

Got that? There is no timer in your toaster! (Unless you have some new-fangled version that does in fact use a computer chip.) The timer effect is achieved by simple physics. This is an entirely different kind of programming which must have originally required a lot of trial and error: how long should the bimetal bar be? How thick? Which metals should be used, to get the right differential lengthening? And then there’s the clever puzzle of how to set up the system of levers so that the bending of the bar triggers them in the right order, purely mechanically.

I had always wondered why toasters don’t let you specify a toasting duration, instead of trying to figure out what a unitless dial that goes from 1 to 10 really means in terms of toastiness. Wikipedia relates that early toasters did have timers you manually set, but this caused problems because the first piece of toast needs longer than subsequent ones to achieve the same done-ness. Using the bimetal bar as a toast-proxy works better because it reflects the thermal properties of the heating elements and naturally adjusts the toasting time to fit.

This cleverness isn’t just about toasters: it’s alarm clocks and vending machines and cameras and all sorts of other devices. This kind of “programming” reminds me of dominoes: setting up all the pieces so that they fall into the right places at the right time. What contraints under which to operate! What an interesting development environment!

Maybe I’ve been living in the computer world for too long.

Next up: The transparent toaster.

How to make a pie crust

I made my first pie the other day—and followed it with my second pie a few days later. They provided the perfect final destination for my nectarine tree’s bounty. There’s something satisfying about making a pie and the crust and using your own homegrown fruit! Now if only I’d grown some sugarcane, harvested wheat, and milked my own cow… that would have been my own pie!

Now, while making pie-filling is trivial, making a good pie crust requires a bit more effort. I didn’t have the vegetable shortening that the recipe called for, so I substituted butter. I baked the first pie on an infernally hot day, and as I was squishing the butter into the flour, it was melting all over the place. The result was a gooey, sticky dough. I rolled it out anyway, with the liberal use of additional flour, using 2/3 of the dough for the bottom and the last 1/3 on top as the pie cover. And it turned out great.

But I suspected that the dough wasn’t supposed to be quite like that, and consultation with other pie-making friends confirmed this. So when I rolled up my sleeves to bake the second pie, I incorporated two useful tips I’d received.

  • Instead of trying to cut or mash the butter into the the flour, freeze the butter and then grate it with a cheese grater.
  • Instead of flailing around with rolling pin and flour, and scraping the dough off the cutting board with a knife, chill the dough and then roll it between two sheets of wax paper.

Both of these suggestions worked brilliantly, even though I didn’t bother to freeze the butter or chill the dough! I’d had success with the cheese grater before, when making biscuits, and it worked perfectly here—faster and less messy than other methods, and the mixture I got out was the appropriate “mealy” consistency, actually needing the recommended couple of tablespoons of water that caused it to glom into a dough.

The wax paper trick is so fabulous that I wonder why it isn’t a staple of all pie recipes. (The one I have recommends rolling out the dough, folding it in half, lifting it into the pan (scraping with a knife if needed), and then unfolding it.) The wax paper not only saves you from having to add any flour (thereby altering the consistency slightly), but it is trivial to transfer the flattened dough into the pie pan (top or bottom) without breaking it; you simply invert the empty pie pan over the bottom crust, flip, and peel off the paper, and later flip the top crust onto the filled pie and again just peel off the paper. My wax paper worked a couple of wrinkles into itself, which left an interesting linear pattern on my pie crust, which I left because I liked it.

The end result with pie #2? A tasty, satisfying, even-thickness, flaky pie crust, with minimal effort.


Never content, friends are now giving me tips on cosmetic improvements, like crimping or fluting the pie crust edges, carving my initials in the pie top, or crafting a lattice. I’ll be sure to share any interesting future developments.

How much baking powder to use

I posted previously about a dramatic biscuit failure I experienced when I forgot to include baking powder, due to a careless reading of the recipe. Instead of regular flour, it called for “self-rising flour”, which already has baking powder mixed in. The strange thing is, no one seems to agree on exactly how much baking powder should go into self-rising flour. Casual googling turned up recommendations for 0.5 tsp, 1 tsp, 1.25 tsp, and 1.5 tsp (same as 0.5 Tbsp) as the amount of baking powder to add for each 1 cup of flour.

Now the difference between 0.5 and 1.5 tsp may not sound like a lot, but consider that it represents a 50% increase or decrease from a middle value of 1.0 tsp. For something as sensitive to stoichiometry as baking is, I’d expect that to make a difference. Then again, it seems reasonable that the desired amount would vary depending on the item being baked and how much loft you hope to get — which sort of defeats the purpose of a pre-mixed flour-baking powder product.

But even specialized biscuit recipes disagree on this, but seem to choose either 1 tsp or 0.5 Tbsp (1.5 tsp, in agreement with my mom’s recipe). (As a side note, they also vary widely on how much shortening or butter to use, as well as how much milk or buttermilk to use and whether or not to chill the dry ingredients + butter. The number of permutations sent me into a brief paralysis (gosh darn it, shouldn’t we have converged on a solution by now?!) until I decided to give up on the web and just use my mom’s recipe.)

I decided that a scientific test was called for. I split up the flour involved in a batch of biscuits (2 cups) into three bowls, for baking powder:flour ratios of 1 tsp:1 cup, 1.5 tsp:1 cup, and 2 tsp:1 cup. There was enough material to make two full biscuits of each type, plus some extra left over for a partial-biscuit. I measured the biscuit height before and after baking. The following chart shows the average (across two biscuits) difference in height I observed (data points in blue, average in red).


A clear difference emerged! It’s even almost linear, which is a bit surprising given the small sample size. Now it would be interesting to try even smaller and larger amounts of baking powder… the curve is likely to have an interesting shape at both ends. But for food, one of the most important measures of success is not size, but taste. I sampled all of the results and found that I couldn’t really tell a difference between the 1.5- and 2-tsp results, but the 1-tsp biscuits were noticeably less fluffy. I conclude that the wise biscuit baker should avoid self-rising flour with less than 1.5 tsp of baking powder per cup of flour (or avoid it altogether and just add your own ingredients).

Some other notes:

  • One of the annoyingly tedious parts of making biscuits or scones is the “cutting in” step that gets the fat (butter or shortening or whatnot) into the flour. I used a tip from my friend Evan: freeze the butter, then use a cheese grater to shred it into the flour. Mix with fingers. Works like a charm!
  • Some biscuit recipes call for milk, some for milk with lemon juice added, and some for buttermilk. Ever wondered why? Well, adding lemon juice or using buttermilk lowers the pH of the liquid (makes it more acidic). And chemical leaveners such as baking powder and baking soda are basic, therefore in theory should react more strongly in an acidic environment (giving your baked good more “rise”). But baking powder is baking soda pre-combined with its own acid (cream of tartar). So you shouldn’t actually need an acidic liquid. I tested this by dropping some baking powder in water, then in buttermilk. If anything, the baking powder reacted more to the water than the buttermilk. (I should do the same test with baking soda.) This also explains (maybe) why some recipes use baking powder and others use baking soda + cream of tartar — the latter want control over the ratio, just like the self-rising-flour issue!
  • Biscuit aficionados recommend the use of flour with a lower protein content (to get even more loft) such as cake flour; see How to make the best Buttermilk Biscuits from Scratch. I haven’t tried this one yet, either.
  • I actually did a parallel experiment, with the same three types of mixtures, but first chilling the dry ingredients + butter. However, a distraction at a critical moment caused me to forget to measure the biscuits before they went into the oven! So I only have their post-baking heights. If anything, the relationship seemed weaker, with less rising action. While a firm conclusion should await more reliable data, for now I’m going on the assumption that the chilling step is unnecessary. (Taste is unaffected, too ;) )

Clearly, the field of interesting experiments with ingredient combinations is a rich and open one, even just for making biscuits!

For want of baking powder

Today I learned what happens when you forget to add baking powder to biscuits. More accurately, maybe I learned to read the recipe more carefully. :/ I was merrily talking with my sister and trying to throw together some quick biscuits to go with our chicken curry (yeah, we have weird menu combinations sometimes). This recipe seemed like a good google-find, with final-product photos of light, fluffy, delicious biscuits. I mixed up the dough, kneaded, rolled it out, cut circles, and put them on the baking sheet. We popped them in the oven. Oddly, 13 minutes later, they were still flat. I figured I’d missed some sort of rising agent, but it took a more careful read to figure out what that was:

Ingredients:
1/2 cup cold butter or margarine
2 1/4 c self rising soft wheat flour
1 1/4 c buttermilk (or whole milk with a tablespoon of lemon juice added)
flour for dusting
melted butter for brushing baked biscuits

Yeah, I’d read right over the “self-rising” part. Whoever heard of “self-rising” flour anyway? Not me! I’d skipped ahead to the recipe steps, which simply refer to “flour”. My post-mortem inspection also revealed this note, which I should have spotted the first time around:

To make your own self rising flour, simply add 1 1/2 tsp baking powder and 1/2 tsp salt for EACH cup of all purpose flour.

Oddly enough, I had noticed (and even commented on) the lack of salt in the recipe… but completely missed the lack of baking powder. Duh! What a stupid mistake! And here I had been all proud because I made risotto last night without a recipe (and with new ingredients I’d never tried) (and it was *good*!). The “biscuits” came out as little flat wafers that are basically inedible (especially if you were hoping for fluffy jam-platforms instead). I won’t even bother with a photo (too embarrassing). Well, next time I hope I’ll pay more attention to the recipe. Excuse me while I return to my self-flagellation.

« Newer entries · Older entries »