How to make chocolate

While in Guatemala, I took a class called the Bean to Bar workshop at the ChocoMuseo in Antigua. This two-hour delight really did go from how cacao grows – to how beans are extracted from the pods, dried, and roasted – to how the cacao nibs are removed, crushed, ground, mixed with other things, and aerated – to make what we call chocolate.

We learned that the ground cacao paste does not become “chocolate” until it is mixed with some sugar. So 100% dark chocolate doesn’t exist; it is 100% cacao :) (and nearly inedible, even for chocolate lovers!)

Quite possibly the most challenging step was when we each took a turn stirring and roasting the beans, which was when our friendly host asked each of us to tell us something about ourselves (in Spanish!). He got really excited about my job at JPL and wanted to know if we’d found life beyond the Earth :)


We roasted cacao beans, then split them open to get the nibs out.

Grinding was a frenzy accompanied by a group chant: “Choco, choco, la-la! Choco, choco, te-te! Choco-la, choco-te, choco-la-te!” Aerating the mixed chocolate by pouring it back and forth between two pottery carafes was also tricky to do without spilling!

We made two kinds of hot chocolate (drink): Mayan (cacao, water, chili, honey, and BLOOD) and European (cacao, milk, sugar, no blood). We used spices instead of blood :) and most agreed that the Mayan was more tasty than the European.

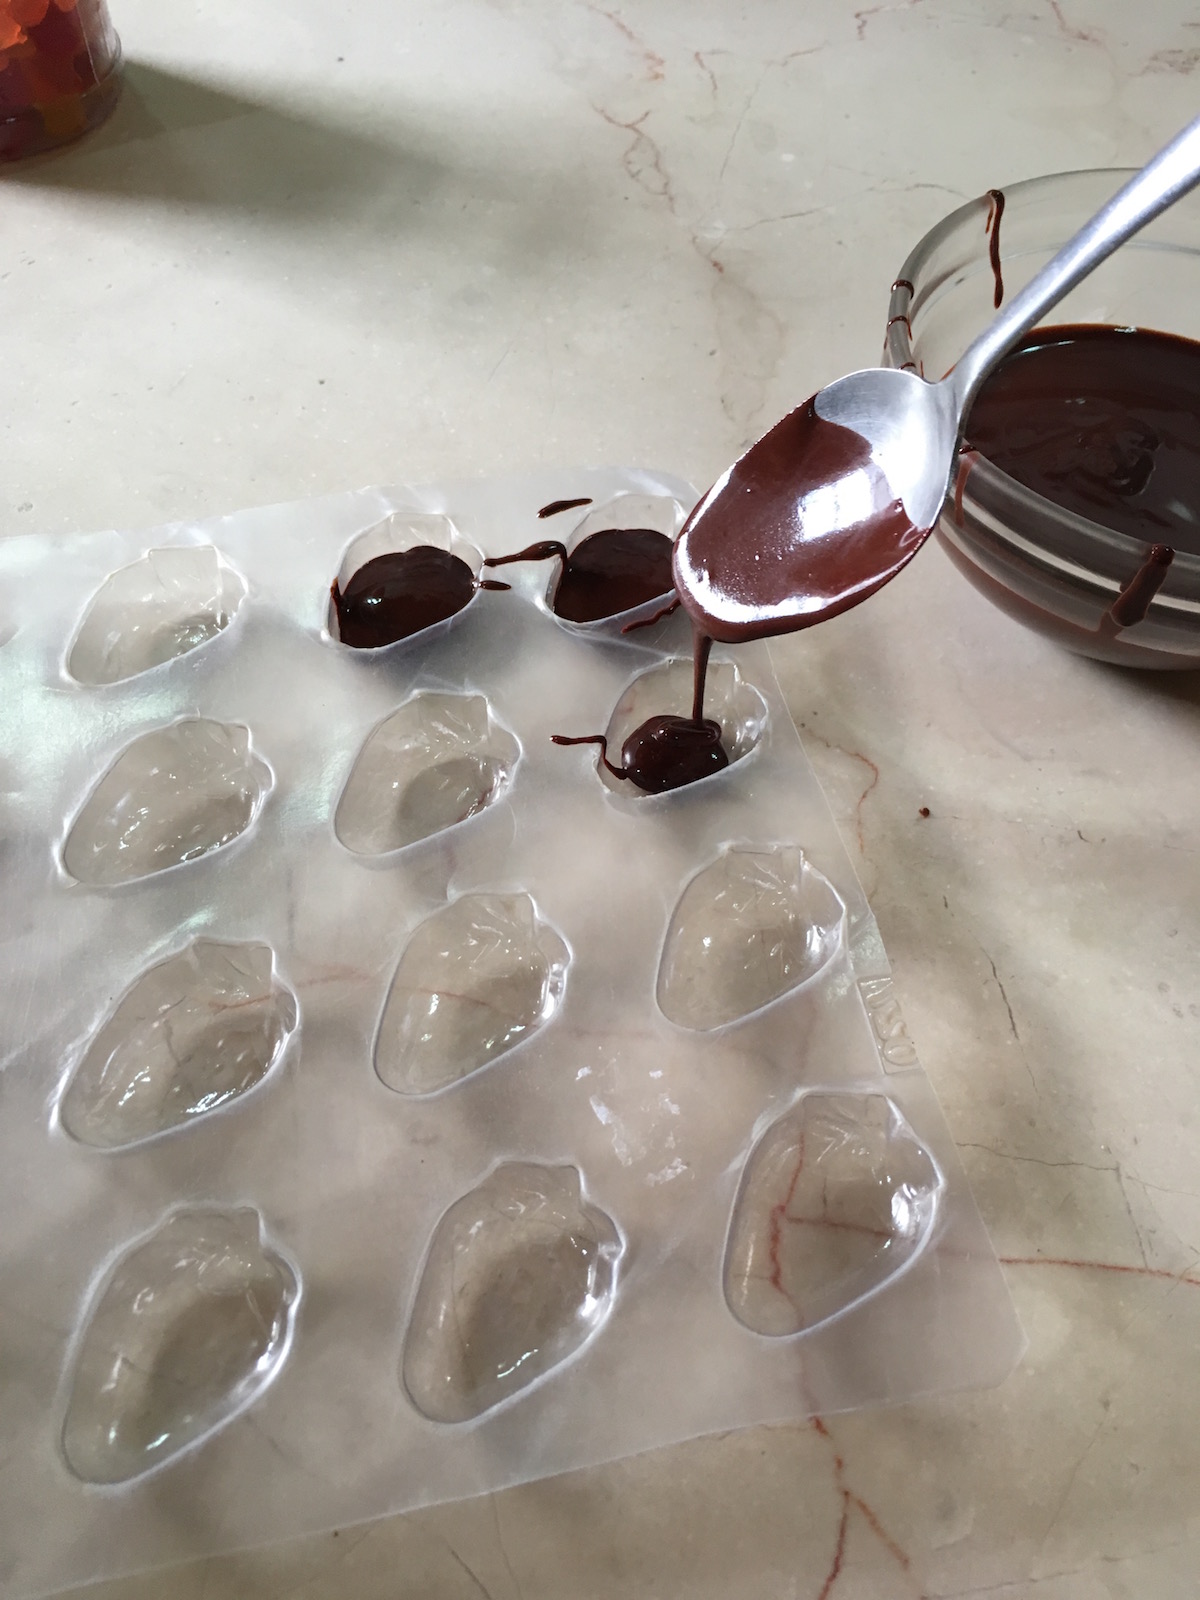
Next, we poured chocolate (I chose 70% dark) into individual molds and added flavorings as desired – I went for cinnamon, mint, cashews, ginger, orange slices; others chose cayenne, salt, gummy bears (?!), and other options I’ve forgotten. Mine turned out tasty, but SUPER intense, and sort of crumbly, possibly due to its dark level and lack of wax/gum/binders/whatever they put in store-bought chocolate.

We also made chocolate tea. It turns out that you can steep the cacao bean shells (from which the nibs were removed) in hot water and make a tea that tastes like a cross between coffee and tea :) I brought home some of this “tea” with a cinnamon flavor. Yum!

Further adventures in breadmaking

Some years ago, I baked my first loaf of bread. Two weeks ago, I decided to try it again. And it failed, and here’s what I learned.

The original recipe said to use “something along the lines of 1 cup” of water to mix in with the yeast. So I used 1 cup. In later discussion on the blog post above, it sounded like people thought 1/4 cup should be sufficient. So when I recorded the recipe, that’s what I used, and when I pulled it out to start baking, I’d forgotten all about this exchange.

With only 1/4 cup of water, I got a very dry dough that wouldn’t let me add more flour in the “add more flour” step. It was also very difficult to knead. But I kept at it. In the end, it barely rose, and I got a very small, dense loaf. Actually, it was still tasty, just thicker than you’d expect from a standard bread.

Lesson: the water does matter! And for this recipe, use 1 cup.

One week ago, I tried again, with 1 cup of water, and the bread came out fantastic again. I also incorporated some suggestions from “The New Best Recipe”, the encyclopedic cookbook/instruction manual I’ve raved about in the past:

  • Let the dough rise in the oven, not just on a counter. Heat oven to 150, leave it there a minute or so, and turn it off. Then put the dough in, covered tightly with plastic wrap. (Actually I used a damp towel but I think either works.)
  • Another great tip, which I didn’t get to incorporate, was putting a rubber band around the outside of the container in which the dough is rising, which ideally is a straight-sided container, so you can ACTUALLY TELL when it has doubled in volume.

Yesterday, I baked another loaf. I wanted to try making something wheatier, chewier, with sunflower seeds and oats in it. The Best Recipe book DID NOT HAVE a recipe of this nature, to my disappointment. But one of the first hits on google was this recipe for Multigrain Sunflower Bread, which sounded perfect.

I followed the instructions, which in this case did call for 1 cup of water, plus 2 cups of flour and 1/2 cup each of sunflower seeds and oats. Many people commented that this made for a very wet, sticky dough and they had to add more flour. Instead, I ended up with… another dry dough! I went through the whole process anyway, but once again it didn’t rise the way it should have. Here is a comparison of loaf #2 (white flour) and loaf #3 (unbleached/wheat flour with oats and sunflower seeds), using the same yeast and water amount:

IMG_0239

The new bread is quite delicious and chewy… but didn’t rise properly. This is either due to needing more yeast, or more kneading, or something … I learned that kneading stretches out the gluten fibers into sheets, so they trap the gas released by the yeast, which otherwise just escapes. So the dry-ish dough maybe didn’t form those sheets. More experimentation is needed!

A cookbook that teaches!

Most cookbooks tell you what to do, but not why. Not so “The New Best Recipe”, in which the superlative is not advertising-speak but instead quite literal: here you will find the recipes that produced the best results in a professional test kitchen.

Initially, the idea of using this mighty tome to create a meal felt like being asked to write an essay based on an encyclopedia. Where even to start? What’s good? Then I started flipping through it, and realized that the point of this book is that it’s ALL good. Unlike most cookbooks, here each item is preceded by a short discussion of what the ideal properties of that item are (“Gingerbread should be tender, moist, and several inches thick. It should be easy enough to assemble just before dinner so squares of warm gingerbread can be enjoyed for dessert.”), followed by a summary of a battery of test experiments that hone in on what’s needed to achieve that ideal (akin to my own experiments with how much baking powder to use in biscuits, but far more extensive). Then comes the final, polished, optimized recipe.

This means that, in addition to getting a really great recipe for gingerbread, you also learn a smattering of fundamental cooking and food science principles in the process. Further, by the time you get to the recipe, you now understand why they made the choices they did (milk over water, molasses over honey, white sugar over brown, etc.). I LOVE IT!

“We start the process of testing a recipe with a complete lack of conviction, which means that we accept no claim, no theory, no technique, and no recipe at face value. We simply assemble as many variations as possible, test a half-dozen of the most promising, and taste the results blind. We then construct our own hybrid recipe and continue to test it, varying ingredients, techniques, and cooking times until we reach a consensus.”

The basic philosophy behind this book (an assumption that good cooking is definable, testable, repeatable, and achievable) is wonderfully comforting to my fundamental personality type. Cooking is art, and skill, but (here) it can also be science. Here’s the book’s phrasing: “All of this would not be possible without a belief that good cooking, much like good music, is indeed based on a foundation of objective technique. Some people like spicy foods and others don’t, but there is a right way to saute, there is a best way to cook a pot roast, and there are measurable scientific principles involved in producing perfectly beaten, stable egg whites.”

The book also includes hand-drawn illustrations of cooking techniques (like how to measure different kinds of ingredients and what style of measuring cups works best) and pictures of failed outcomes (like five blueberry muffins that do not qualify as “best”).

Now I can’t wait to actually try out one of these best-recipes. I think I see some “Chicken and Rice with Saffron and Peas” in my future tonight. Thanks to my friend Elizabeth for a fantastic gift!

National Train Day… and more trains

On May 7, I headed down to Union Station to celebrate National Train Day. I rode the Gold Line Metro to Union Station, delighted not to have to tackle parking in downtown Los Angeles. I arrived just as the event started, in time to trail along behind a contingent of the USC Marching Band (!) that was proceeding with much fanfare through the station.

The festivities included a variety of fun sights and experiences. There was a large model train setup with three trains running at the same time, weaving their ways through miniature trees and houses. There were tons of booths giving out railroad safety stickers, brochures about how to get to San Diego (and many other places) on the train, and information on the railroad workers’ union. A particular highlight was a cooking demonstration by renowned chef Tom Douglas, who owns five restaurants in Seattle and has crafted recipes for Amtrak’s trains. He showed how to make a grilled salmon + cucumber salad dish using the kind of stove available on the train — and then everyone in the audience (100+ people) got to try it. It was fascinating to see a top chef fillet a 15-pound salmon up close! (See picture at left of Chef Douglas, with an angled mirror above him so you could watch him work.)

There were brochures and information of every stripe, except one. I asked around a few places for information on Amtrak’s USA Rail Pass. I’d read some information about it online, but I was sure at this event, of all places, there’d be more to learn. But I came up totally empty-handed. You could learn how to get to Fillmore, to shows in Anaheim, and even to the Grand Canyon, but no information on the 6-month rail pass. The best I could get was a suggestion to call an 800 number. Amtrak, what a huge missed opportunity! (Or do you not want people to take advantage of the rail pass for some reason?)

As time went on, the number of people at the event ballooned. Apparently this was THE place to be on a Saturday afternoon with your kids. I was glad I’d arrived when I did, since an hour later there was an hour-long wait just to walk past the booths with brochures and stickers. However, because I’d saved the “Train Equipment Tour” for last, I ended up not getting to see what it was all about — the line stretched almost all the way through the station, with waits even for people who’d requested timed tickets (I didn’t know you could do that :) ). So, perhaps another time!

In related news, I later got to visit Travel Town, a local railroad museum. It’s a yard full of old engines and cars, most of which you (sadly) cannot climb on or walk through. Some few are open for curious eyes and hands, though. It’s also fun just to walk around and work out how the wheels and brakes and other pieces on the outside must function. You can even rent out a rail car for birthday parties. I admit, I was tempted! It turns out that Travel Town, like so many other organizations, makes good use of volunteers; you can even volunteer to learn how to LAY TRACK! Oh, for more hours in the day.

I also recently watched “Unstoppable”, a movie about a runaway (uncrewed) train that is a dramatization of real events. It’s exciting and action-y and definitely a dramatization; but interestingly, the main setup and events really did happen. It is an awe-inspiring thing, to see a behemoth of mechanical energy loosed from human control and rampaging blindly through the countryside. How, how to stop it? Watch the movie and find out!

Why chill cookie dough?

In the process of making zucchini-raisin cookies for a book club meeting today (we’re discussing The Demolished Man, by Alfred Bester), I encountered an instruction in the recipe about chilling the mixed-up dough for at least an hour before baking the cookies. I’ve run into this before, but it seems to appear inconsistently. So I wondered: why do some recipes call for chilling the dough and others do not? Since you’re going to bake the dough at 350+ degrees anyway, does it matter whether it starts out at room temperature or fridge temperature? Won’t it just take them longer to bake?

Apparently not. Googling suggests that there are two main reasons cited for chilling dough. One applies to cookies that will be rolled out and cut (like sugar cookies), especially if they use butter for their fat source. Butter at fridge temperature is much easier to work with than butter at room temperature, which is sticky. And of course, even if you start out with butter you pulled from the fridge, by the time you’ve beat it with eggs and sugar and other ingredients, it’s likely to have warmed up and been dashed into tiny pieces that are quite squishy and sticky. I was already familiar with this concept from my previous experiences making pie crusts, although I’ve never chilled that dough after mixing it either (maybe I should try that).

But the cookies I’m making aren’t rolled cookies. It turns out that there’s a more subtle reason for chilling drop-cookie dough. This applies to cookies with flour (which explains why recipes for other kinds of cookies may not recommend chilling). Chilling permits the gluten strands in the flour to relax, avoiding a “rubbery” consistency in the final product. (The same reasoning is behind the advice to let pancake dough sit after mixing and before dropping it on the griddle.) The elapsed time may also permit the flour to absorb more of the moisture in the dough, so the cookies don’t spread out so much when baking.

So how long should you chill the dough? My current recipe says “Cover dough and chill for at least 1 hour or overnight.” One hour or overnight? Isn’t that kind of a broad range? (Whoever could possibly mix up cookie dough and then wait until the following day to bake it?)

David Leite of the NY Times conducted the experiment I would have done (although he used chocolate chip cookies), saving me the trouble, and reported on his results in “Perfection? Hint: It’s Warm and Has a Secret”. He mixed up dough and then baked batches that had been chilled for 12, 24, and 36 hours. He reports:

“At 12 hours, the dough had become drier and the baked cookies had a pleasant, if not slightly pale, complexion. The 24-hour mark is where things started getting interesting. The cookies browned more evenly and looked like handsomer, more tanned older brothers of the younger batch. The biggest difference, though, was flavor. The second batch was richer, with more bass notes of caramel and hints of toffee.

Going the full distance seemed to have the greatest impact. At 36 hours, the dough was significantly drier than the 12-hour batch; it crumbled a bit when poked but held together well when shaped. These cookies baked up the most evenly and were a deeper shade of brown than their predecessors. Surprisingly, they had an even richer, more sophisticated taste, with stronger toffee hints and a definite brown sugar presence. At an informal tasting, made up of a panel of self-described chipper fanatics, these mature cookies won, hands down.”

But how did they compare to going straight from the mixing bowl to the oven, with no chilling at all? No data. Also, I spot a methodology problem: although he ensured similar dough consistency by mixing all of the dough at the same time, the increasing chill durations meant that the baking happened at different times. While careful to control for the same cookie sheet, same oven, and same oven temperature, this has to mean that the 36-hour-chilled cookies would be fresher and have an obvious edge over the 12- and 24-hour-old previously baked cookies. To get all of the cookies to come out of the oven at the same time, you’d need to mix up separate batches (hopefully consistently!) at 36, 24, and 12 hours before the baking extravaganza.

No time for that today! My cookies won’t get 36 (or even 12) hours of chilling this time around. But I’ll have satisfied the minimum requirement. Maybe I can do the full experiment another time.

Older entries »